Bio pages
Build a ti-ny.link bio page with a heading, links and content blocks. Customize your page, check it on mobile and share one address.
Last verified: Created the Ember Café demonstration page and checked the Ember Studio block editor and public page.
What is a bio page?
A bio page, also called a link-in-bio or biolink page, is a hosted page that brings your links and content together at one address. Share it in a social profile, email signature or campaign so visitors can find your work, shop or latest release.
Explore Bio pages for the product overview and examples.
Create your first bio page
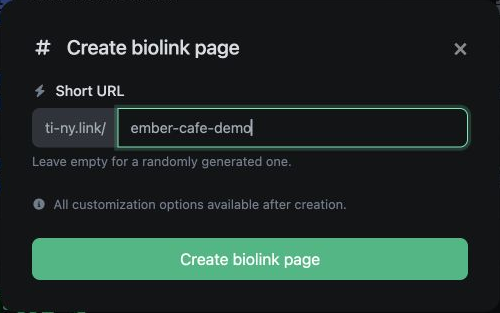
Choose a page address
- Sign in to ti-ny.link. Bio pages are labelled Biolink pages in the account navigation; the Dashboard creation menu uses Biolink page.
- Choose an available address and create the page within your account's page allowance.
Add a heading and useful links
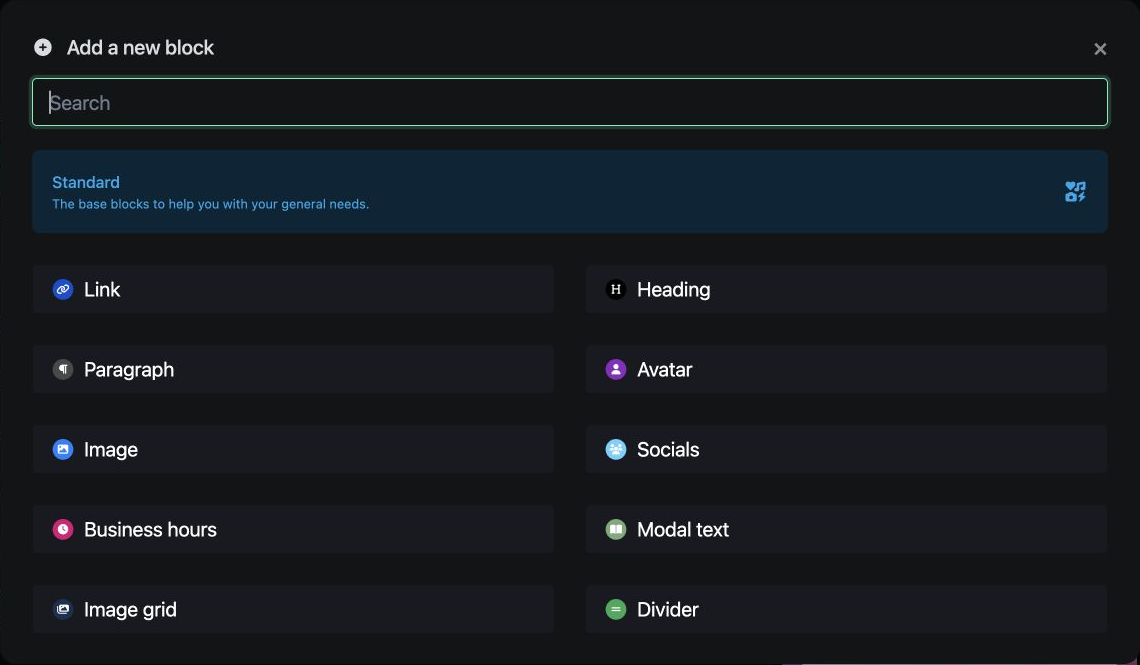
- Open Add block → Heading to add an introduction.
- Use Add block → Link for a labelled destination.
- To edit an existing block, open Blocks, select its title, make the change and choose that block’s Update button. Page-wide options are under Settings, with a separate Update button.
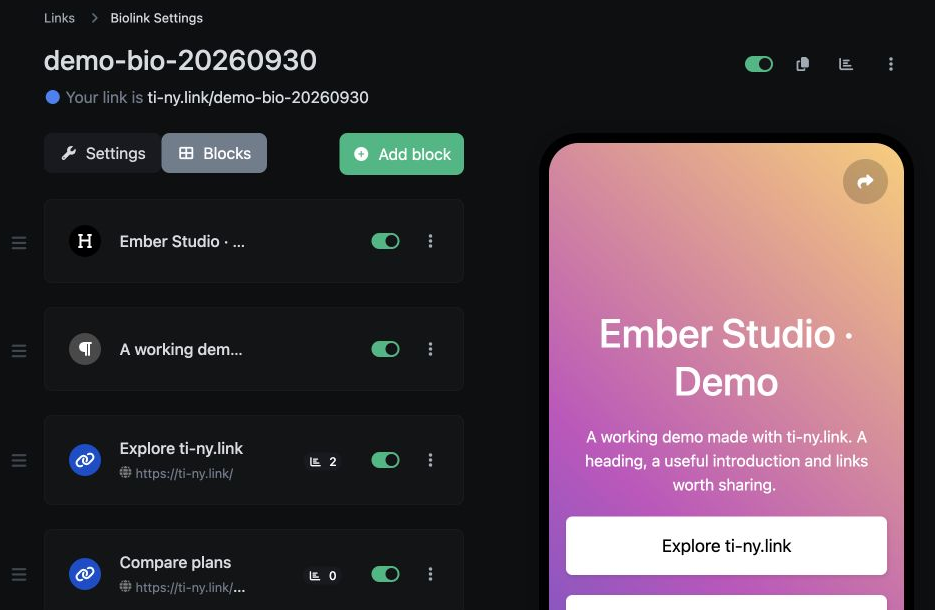
Use the relevant Update button to save edits. A change in the editor preview is not a substitute for checking the saved public page.
Check the public page
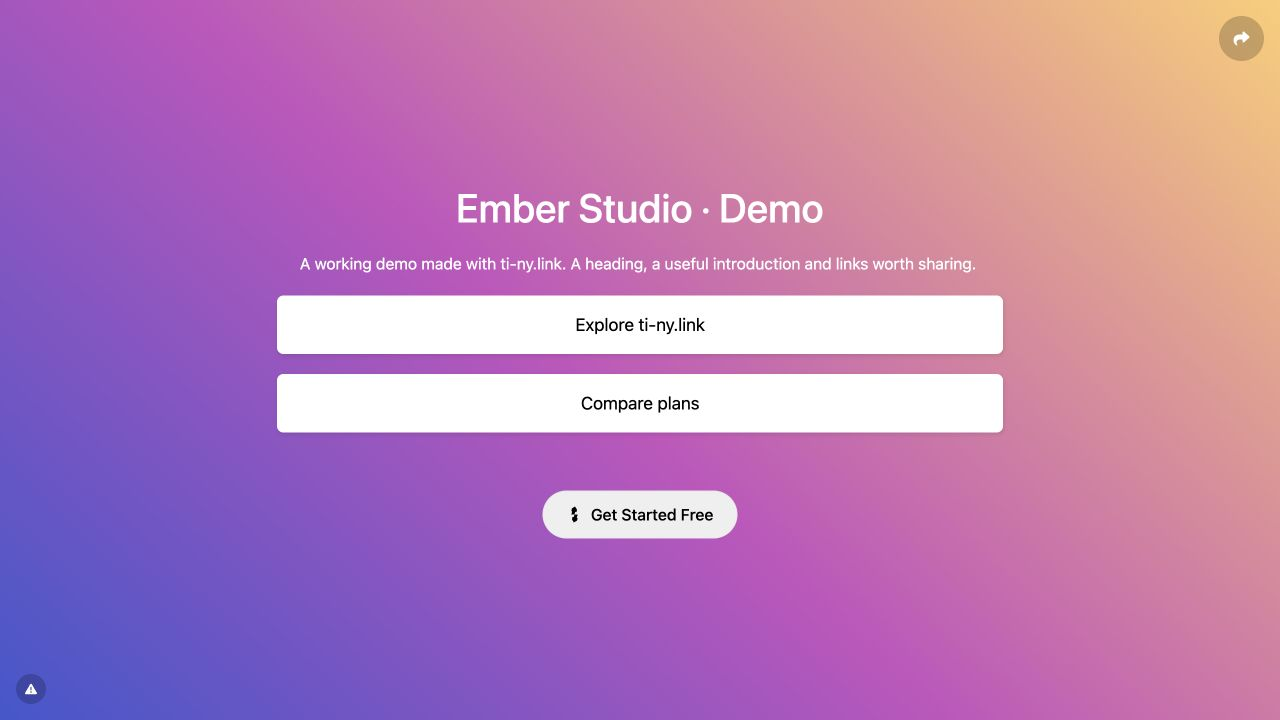
Open the public page, check its content and test the links before sharing its address. Review the same page on a phone. Check external shops, forms and booking destinations through to the relevant service.
Choose useful content blocks
Start with your most useful link. Add images, text, media or other available blocks when they help a visitor take the next step. The bio-page block guide describes the available categories.
For a creator launch, place the current release or offer near the top and move older work lower down. Link to your existing store or booking service for transactions that happen there. See the creator launch guide.
Customize your page
Use the design options available in your account to choose colours, branding, themes and blocks. Review the result on mobile as well as desktop; embedded services and long labels can change how a page feels on a small screen.
The Free plan does not allow you to remove ti-ny.link branding or add your own branding. Compare the current paid-plan options if you need those controls.
For search and sharing, open Settings → Seo. This section includes Page title, Meta description, Opengraph image, Language and Block search engine indexing. Use a descriptive title and summary, choose the page language and review the indexing option before saving. Give link buttons meaningful labels, and add descriptive image text where the block supports it.
Custom domains are available on eligible plans. Follow the domain setup guide and test the public address before sharing it.
Give different projects their own pages
A portfolio, shop and podcast can each have a focused page within your plan’s allowance. This keeps each audience’s next step clear. Follow the multiple bio pages guide for a worked example.
Page counts, block limits and other features depend on your plan. Compare current allowances and confirm them in your account.
Review activity
Use the available page statistics to review recorded activity. For distinct campaign placements, create separate short links to the bio page and compare their statistics over the same period. Read the Analytics guide for the limits of referral and visit data.